42 Simple Woodworking Projects For Beginners
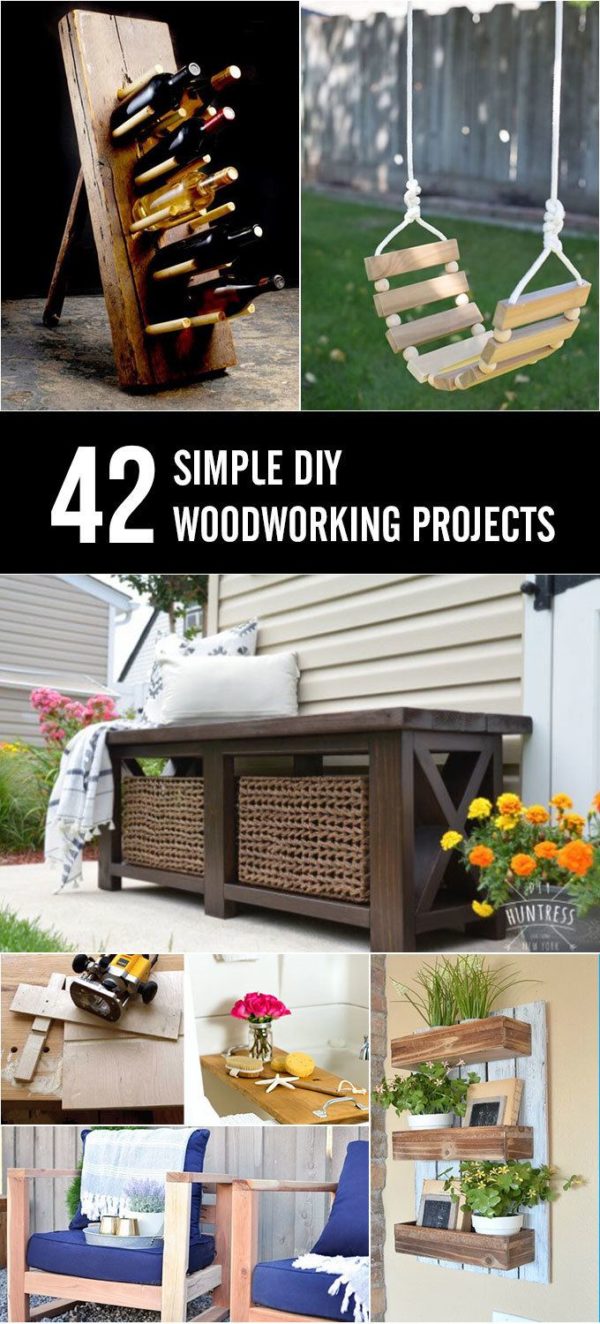
Everyone starts somewhere. If you are new to woodworking and you are trying to find that perfect project, then take a closer look here.
A simple but useful project will provide you with the feeling of accomplishment and easy gratification, which will help you to take on more challenging jobs.
I put the following list of simple woodworking projects together from across the Internet and I hope that you will find a project from it that inspires you enough to take action and become a better and more passionate woodworker.
Ready for your next project? Here are some plans that I recommend for you to read such as workbench plan, table saw fence, miter saw stand, lathe stand, router dado jig, router table, scrap wood project, woodworking plan, homemade log splitter.
1. Free DIY Floating Shelves Plans
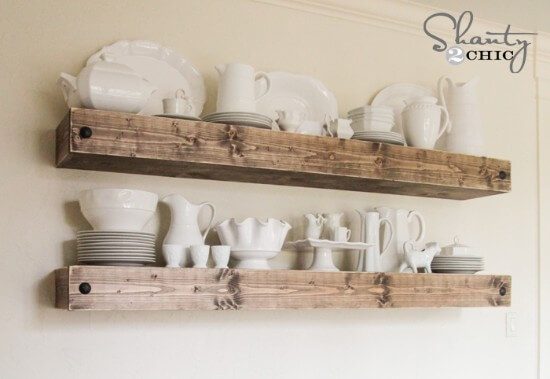
These floating shelves from the Rogue Engineer are great for anyone who needs to try their hands on basic woodworking projects. The free plans provide you with all the information you need, plus it comes with a step by step guide.
You get a tools list, a materials list, and a cut list. Each shelf is 73 inches long, 12 inches deep, and 5.5 inches high.
The plans are available for download in a PDF file, which also allows you to print them out. Each of the steps in the tutorial also includes a diagram to make things easier to understand.
2. DIY Tree Swing Tutorial
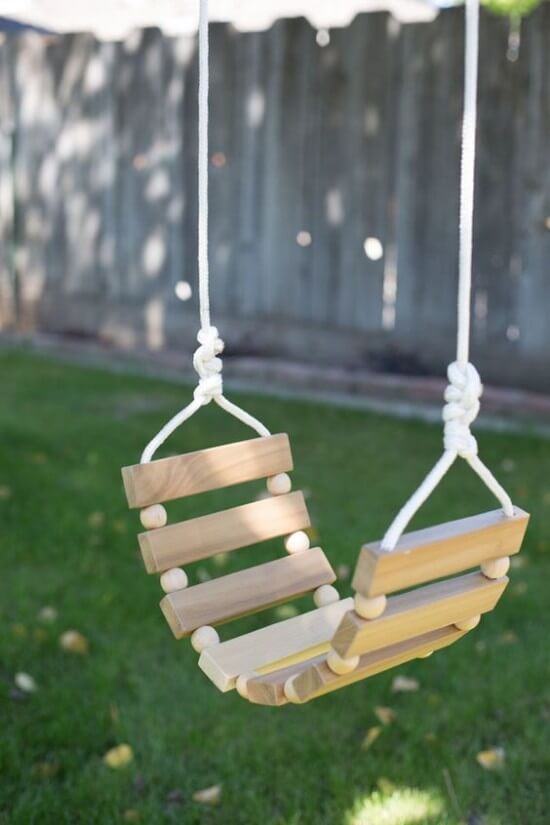
How about building your very own tree swing for kids or adults? It's possible with the right tools, materials, and guidance.
This tutorial shows you how to do it in 6 steps. You will need the right materials though, which include wood boards, beads, and a 3/8-inch nylon rope.
The step by step guide begins with the cutting down of the wood to the right size. Then comes the sanding of the edges to make it smooth, and the tutorial continues with the joining of the ropes, beads, and boards into one beautiful swing.
3. Large-Scale Tic Tac Toe Game DIY Tutorial
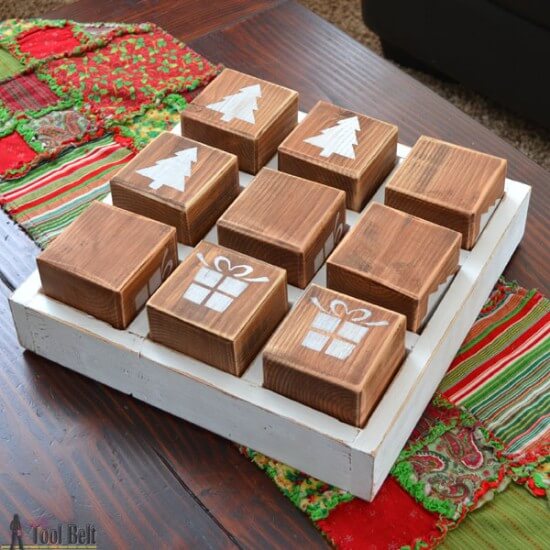
You can also build games for yourself and one of the easiest games you can make from wood is this large tic tac toe game.
The entire thing is about 14 x 14 inches large and 4-1/4 inches high. You will need to cut the 9 blocks from a 4x4, while the rest of the game is made from plywood and 1x3's.
At the end of the tutorial is the painting of symbols onto the blocks. You can also decide to paint the game tray and even get a little creative with bright colors.
4. Free Breakfast Tray DIY Guide
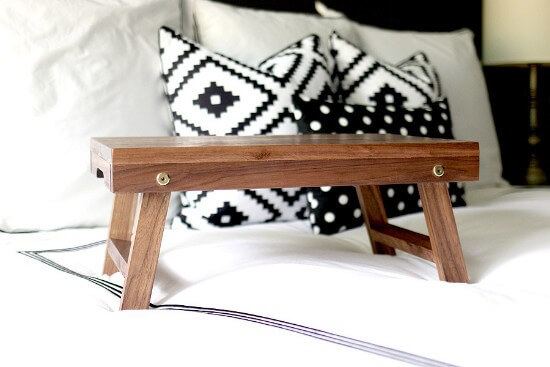
Here is a beautiful breakfast tray/lap desk that you can try your hands on as well. The beauty of this project is that you can cut all your wood from a single 1x8 board using a table saw.
The tray is 8 inches high, 14 inches wide, and 19 inches long. This tutorial also shows you how to make a 14-inch tray from 2 8-inch wide boards.
You get a downloadable PDF file with the complete plans for this project and it comes with lots of diagrams and a 4-step construction guide.
5. Modern & Stylish DIY Wine Rack
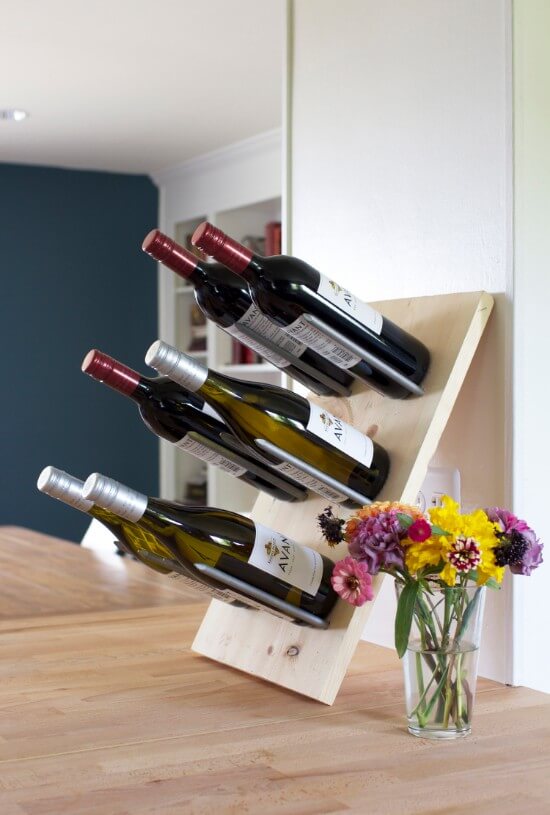
If you are a wine lover, then you may fancy this project. It uses a single wood board and framing nails to create a simple but lovely wine rack.
Other needed tools include a drill, a hammer, a ruler and a pencil. This project is quite simple and just requires you to make holes in the board and then pass the nails through those holes.
In order to know exactly where to attach the nails, the ruler and pencil first come into play. In the end, you might want to build a more solid base for this rack though.
6. Beautiful Desktop Organizer DIY Tutorial
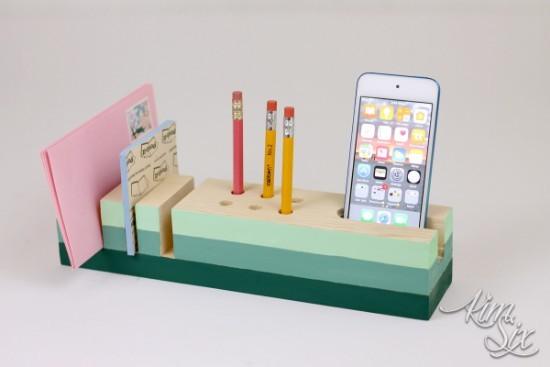
Using a single 1x3 board, you can build a beautiful desktop organizer like this one. You will need a table saw or miter saw to make some cuts and clamps to help in gluing the boards together.
You will also need to drill holes for pencils and pens, as well as make cuts for holding your journals. For the part which will hold a smartphone, a wood router will do the job.
All these steps are well explained in the tutorial, including large and clear photographs for easy understanding.
7. Mini houses from Scrap Wood DIY Tutorial

There are lots of things you can do with pieces of scrap wood. This project requires just little pieces, which you then turn into decorative mini houses.
If you have a miter saw, then making the angled roof cuts will be much easier. You can also clamp the houses together when sanding them to save time.
The final part is the finishing. You can choose to go minimalist without any colors or choose to use any color or wood stain that you want. This tutorial even shows you how to make the cute windows for the mini houses.
8. Free DIY Magazine Holder Tutorial
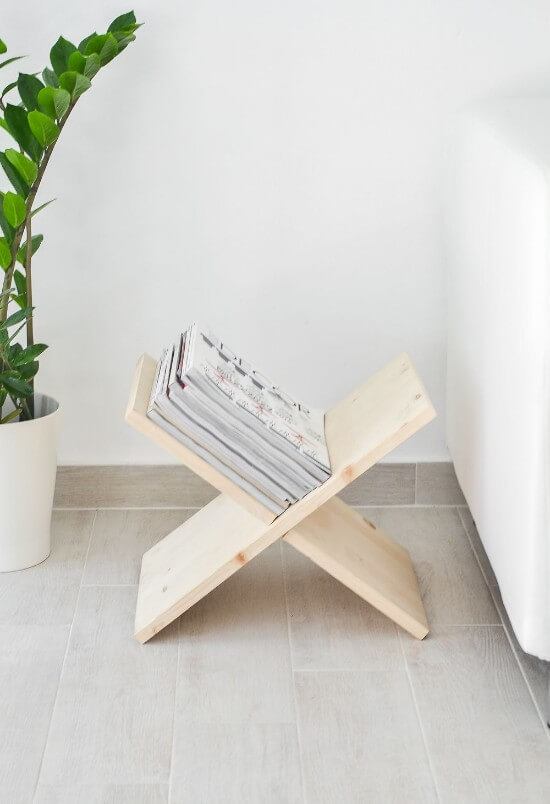
For those who want really simple woodworking projects, here comes another opportunity. Its a magazine holder made from 2 pieces of equally sized wooden planks.
This tutorial begins with listing the needed materials and tools. It then moves on to show you how to make the stand in 3 steps.
It's a really simple project though, but you can also decide to get a little creative and make it more exciting.
9. Wedding Wine Box DIY Tutorial
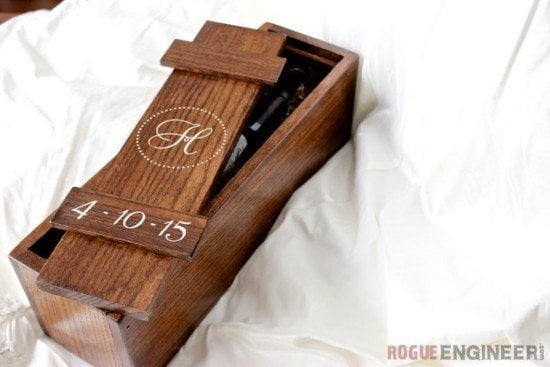
Wedding wine boxes are very romantic and also gaining in popularity. If you don't know what they are, then you'll need to go through this tutorial for a detailed explanation.
This one cost less than $30 to make using solid red oak. The free plans begin with a tools list, including a brad nailer, miter saw, pencil e.t.c. It continues with a materials list and a cut list before starting the tutorials.
The actual construction is delivered in 4 steps, ending with the staining and varnishing of the oak to bring out its beauty.
10. Hairpin Nightstand DIY Guide
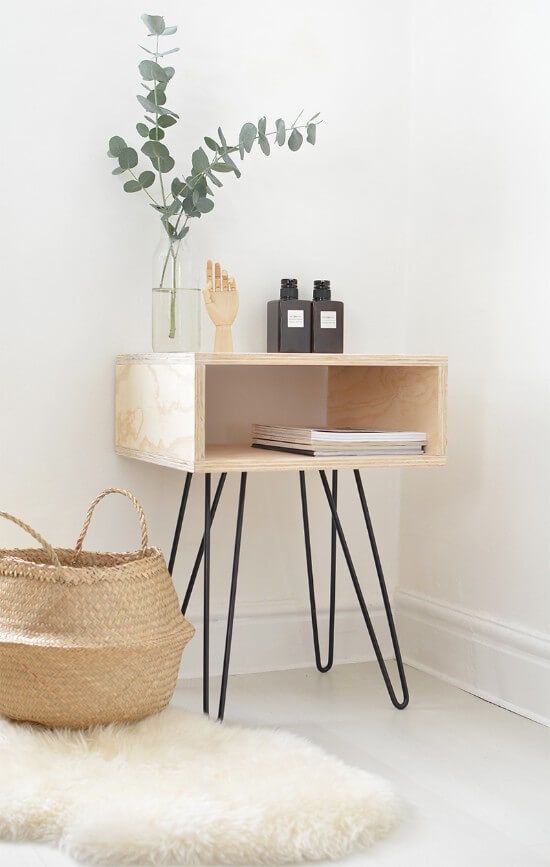
Here comes a mid-century nightstand with hairpin legs. This project uses just plywood, hairpin legs, wood glue, and nails.
You might want to paint or stain the nightstand if you want, as well as its legs, or you could just leave it in its raw look like in this guide.
The body was cut and joined together using wood glue. This guide also offers a different tutorial for using dowels to hold it together. Using dowels can be much better, but it's also not necessary, especially if you are not comfortable using them.
11. Free Rustic X-Bench DIY Plans
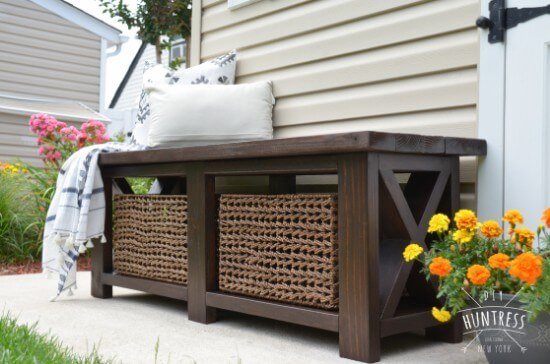
This is a much larger project than the previous projects in this guide. It cost about $30 in wood and uses mostly 2x4's. If you like, you can choose to forego the rustic look and get a little creative with the finishing.
There is a link to the free plans, which include detailed drawings and a step by step construction guide. The bench is 19 high, 54 inches wide, and 17 inches deep.
You will need a Kreg Jig for this project in order to combine the 2x4 boards into 17 inches wide boards for the shelves and the tabletop.
12. Mobile Lumber Rack DIY Tutorial
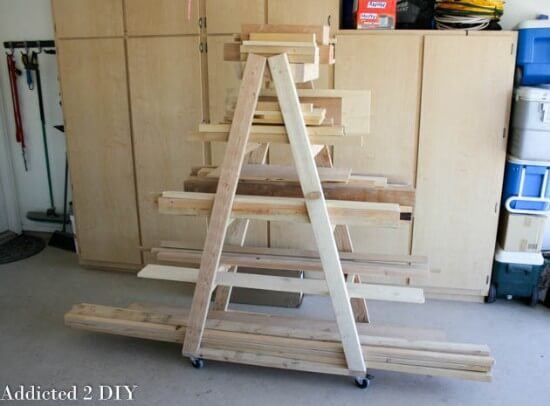
Being able to move your lumber rack from place to place can be quite helpful because it offers you more freedom in the way that you work.
This project is basically an A-frame rack on casters. It is 68 inches high with 5 levels, 21 inches deep and 40 inches wide.
It is built mostly from 2x4's. This tutorial shows you how Katie built hers, although you will need to click on the provided link to get the free plans.
13. Jen's Amazing Wine Rack DIY Tutorial
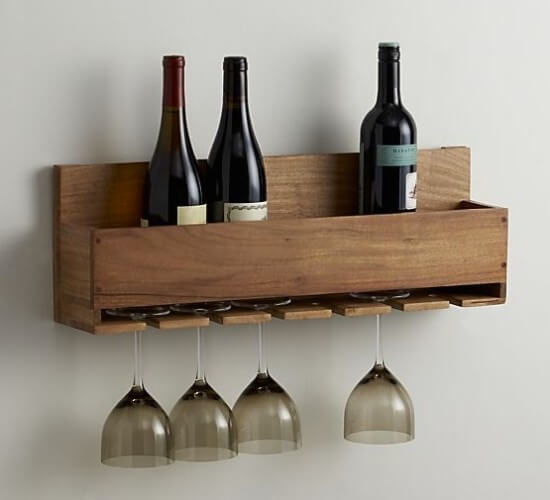
If you love wine like Jen does, then you should build a wine rack like hers. This rack includes space for wine bottles and glasses, as well.
It is 8 inches high and measures 25 inches across. You get a materials list, a cut list, and a tools list, which includes a jigsaw, circular saw, tape measure and others.
There are plenty of diagrams in this tutorial, and they help to explain what is going on. The tutorial comes in 6 steps, starting with the cutting of slots for the wine glasses and ending with the attachment of hanging hardware.
14. Larissa's DIY Pet Bed Tutorial
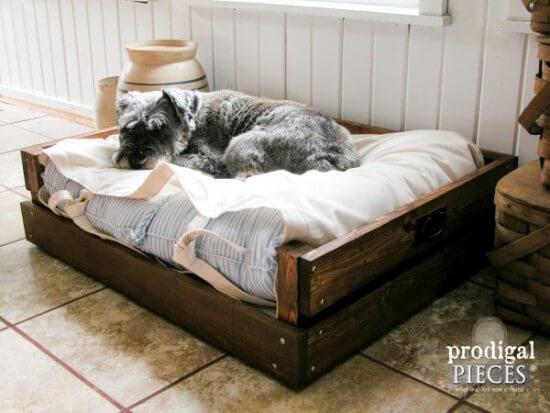
Here's an interesting project for those who own a pet. You can build a comfortable bed for your dog by using Larissa's free plans. She posted the plans on a different site, so you'll have to click on the link to get it.
In addition to the wood for this bed, you will also need 2 pillows, thread and about a yard of a 60-inch wide fabric for the covers.
Larissa provides detailed plans for everything, including diagrams and pictures. She provides a 10-step guide plus a materials list and a cut list.
15. Reclaimed Lumber Wine Rack DIY Guide

Using an old piece of reclaimed lumber, this project creates a simple and yet very unique and lovely wine rack featuring wooden dowels.
The tutorial begins with measuring out 32 inches from the board and cutting it to size with a circular saw. The dowels are also measured and cut, then everything is joined together.
This tutorial is simple and straight to the point. Each of its steps is well presented and includes a picture, making it easier to understand.
16. Erin's Wooden Circle Shelf Tutorial
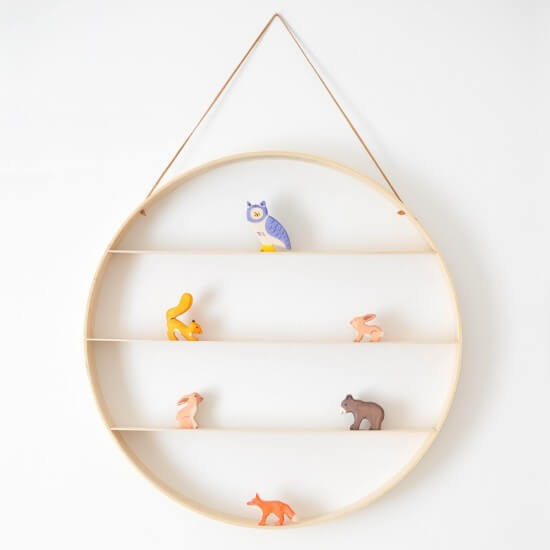
You will need lots of clamps and patience for this one. Erin combined and glued 3 quilting hoops while holding them in place with clamps.
After the wooden circle had dried, she then moved on to the addition of basswood sheets. These are the horizontal ones inside the circle. Erin glued everything into place and also added 2 holes for hanging her masterpiece.
She explains every step of the process in detail and there are plenty of pictures in this guide to help bring the idea home.
17. DIY 7-Bottle Countertop Wine Rack

For a more modern-looking wine rack, this project presents you with a 5-step tutorial to get building using square dowels.
Necessary tools include a miter saw or circular saw, small clamps, and a drill. Step 1 of the tutorial deals with the cutting of the dowels to size.
This project should take a beginner less than a day to complete and its main cost is the price of the square dowels. You also get a cut list and a complete diagram of the project with each piece labeled alphabetically.
18. DIY Bath Caddy Tutorial
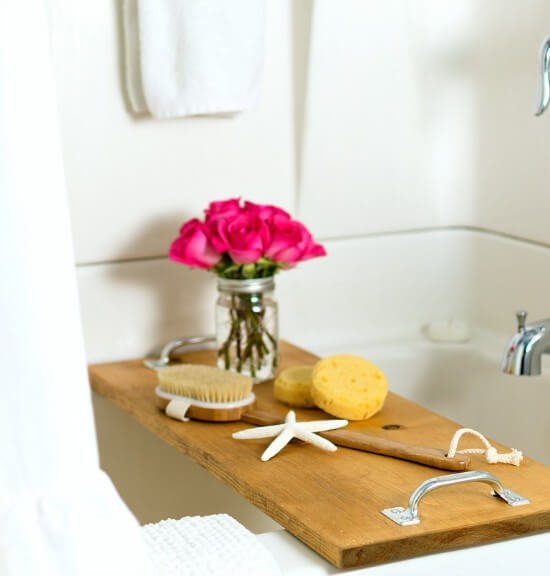
Bathing with a caddy provides a more enjoyable and rewarding bathing experience. You don't even have to spend much on a caddy because you can easily build it by yourself.
This tutorial shows you how to do it using a board, 2 handles, and some wood finish. You may need to cut down the board to size if it is too long, and then sand it to perfect smoothness.
Every step is shown in this guide, with clear and large pictures, plus detailed explanations. The choice of finishing is yours here, but keep in mind that the wood should be sealed to protect it from bathing water.
19. DIY Wooden Bike Stand Tutorial
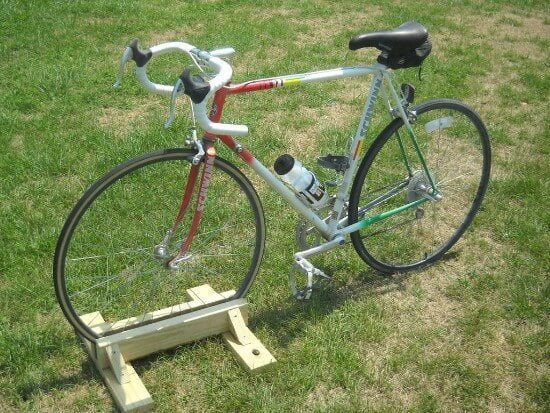
It may never have crossed your mind before, but it's quite easy to build a bike stand completely from wood. This tutorial is simple, and therefore, part of this basic woodworking projects list.
There are 7 steps in total, beginning with the measurement of the bike's wheel using 2 small pieces of wood. The main construction then begins in step 3.
You may need to make some adjustments to the stand, so it can perfectly fit your bike's wheel. Also, don't forget to properly seal your work against weather elements for a longer life.
20. DIY Wine Rack from Pallets Guide
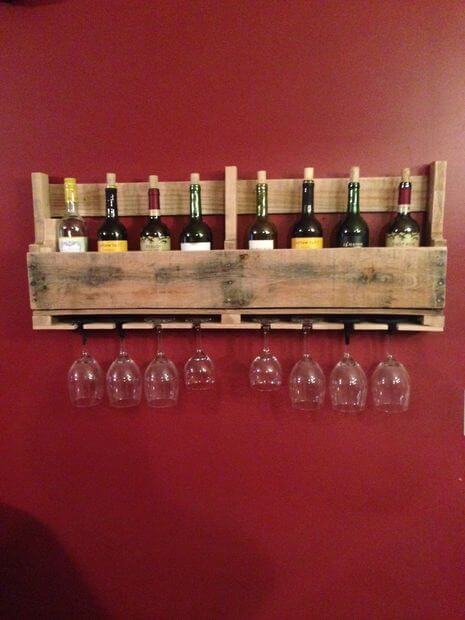
Here is a DIY project which won the second prize in a DIY pallet contest. It might be made for wine, but you can also get creative and make yours for whiskey or brandy.
There are 9 steps in the tutorial. It begins with the cutting of the pallet, which is a requirement for this project anyway. The other steps then follow, such as sanding and making holes for the glasses.
It's important to use a level when hanging this rack so that it can be very stable. Also using a different kind of finish might work out great.
21. Simple & Cool DIY Wooden Picture Holders Tutorial
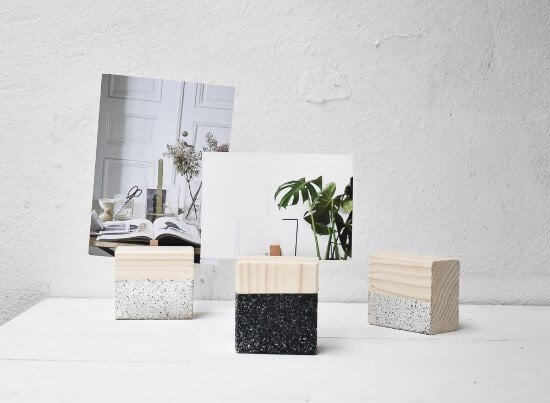
This one definitely belongs on this list of easy woodworking projects. The idea is to create beautiful blocks of wood, which are then used to hold and display pictures.
With just 4 simple steps, this tutorial is quite short but straight to the point. You will first need to get wooden cubes, then prepare them for painting by sanding, then paint, and finally attach pegs to the backs of the cubes.
The choice of paint here is left to you. You can either use simple spray paints or even get more creative and add colorful patterns to the cubes.
22. DIY Truss End Table Tutorial
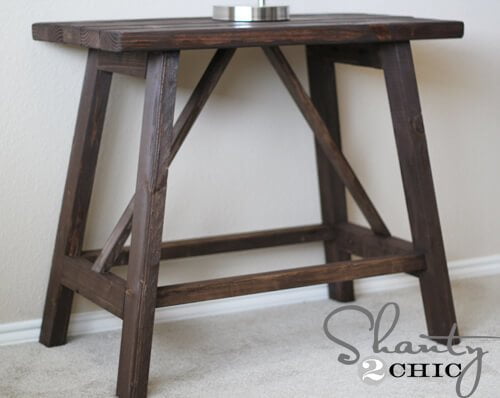
Ana White and Ashley from Shanty2Chic worked on this table together. It's a pottery barn inspired piece of furniture, which saves you hundreds of dollars by making it by yourself.
This tutorial begins with a materials list, a cut list, and a tools list, which includes an orbital sander, a Kreg Jig, and a drill bit set, plus others.
The table has a height of 28 inches, it is 31 inches wide and 19 inches deep. It will cost about $15 in wood to build.
There are 6 steps in the tutorial and each step contains a detailed diagram with equally detailed instructions.
23. Wooden Triangle Shelves DIY Guide
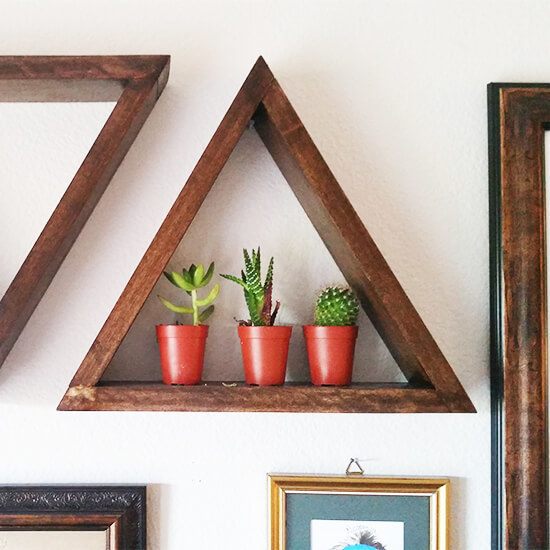
Triangle shelves are a great way to add style and character to your home or office space. This guide shows you how to create these simple but valuable pieces.
The project here used 1x4 boards, but you can vary your board's size if you like. Just make sure it is wide enough to still function as a shelf.
You will need a miter saw for this project because the boards need to be cut at 30 degrees. This tutorial explains the process rather well though.
24. Easy & Stylish Bar Stools Tutorial
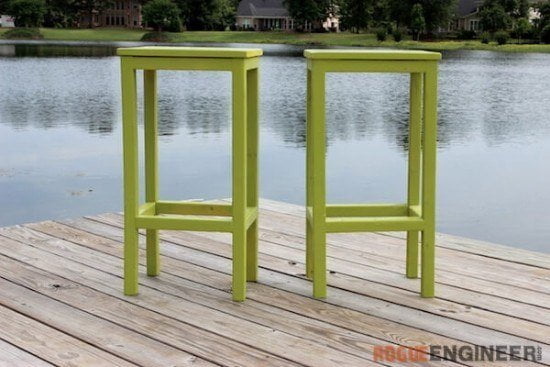
Jamison the Rogue Engineer built these 2 stools as an addition to his party cart. Each stool is 28.7 inches tall, 15 inches wide, and 11.25 inches deep.
He includes a list of tools, plus the required materials to make 2 stools. He also provides a cut list, which is equally in visual form.
You can either follow the step by step guide on this site or download a printable PDF version of the tutorial. He uses plenty of pictures to make things easily understandable and the choice of paint is, of course, yours.
25. Reclaimed Oak Serving Tray DIY Guide
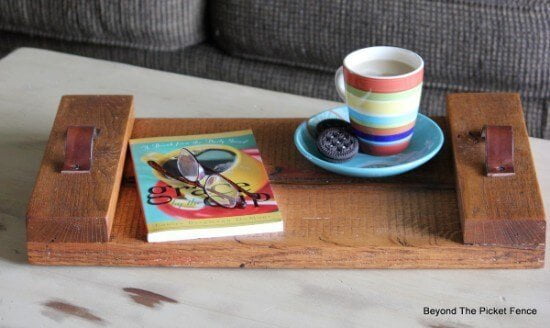
A piece of heavy oak wood was used here to create a rustic but beautiful serving tray with beautiful leather handles. One interesting aspect of this tray is that the wood was stained with cow pee, which makes it quite a unique piece of furniture.
The procedure is simple. First, you will have to cut it down to the right size. Then you sand it until you are perfectly satisfied with its smoothness and outward appearance.
Next comes waxing to seal the wood. It is recommended to use food safe wax like was used in this tutorial. Finally, you then add the handles.
26. DIY Mudroom Bench Tutorial
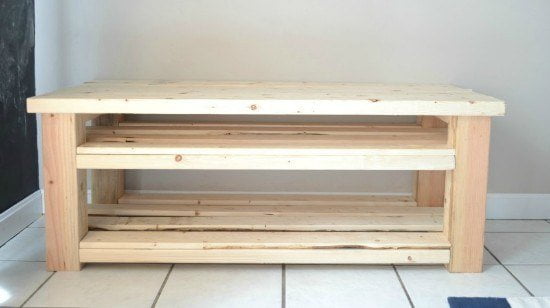
Here comes a 6-step tutorial for a mudroom bench with 2 shelves. The second shelf here is designed specifically for slippers.
You will need clamps, a drill, a framing nailer or any other nailer, a saw and other standard tools. There is also a materials list including hardware supplies, plus a cut list.
This bench measures 48 x 22 x 18.5 inches. The legs are made using 4x4's, while 1x4's and 2x4's are used for the shelves, with the bench-top being done with 2x6's. Every step is well explained in the tutorial though.
27. DIY Wooden Wall Planter Guide
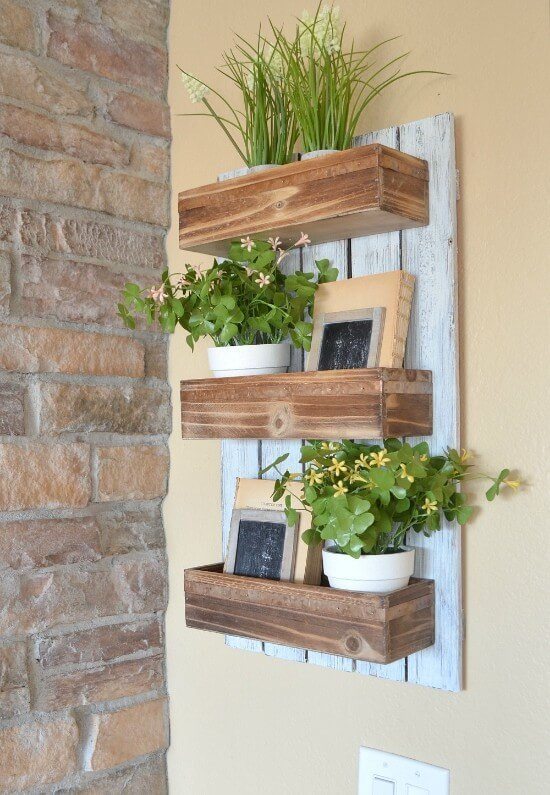
For this project, you will need a pallet and some wooden boxes. Sarah bought hers, so if you decide to make the boxes yourself, then you are on your own.
Her idea was to give this project a rustic look, so she set to work on the pallet first, painting and sanding it down until it got the look.
She then attached the boxes to the pallet and then hung it on the wall. There are many changes that you can make to this tutorial to come up with a more personal design.
28. 15-minute Wooden Clothes Rack DIY Guide
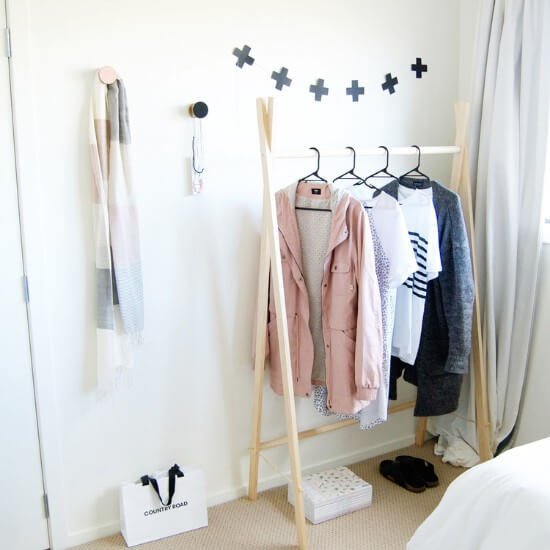
Chloe built this with her dad and it took them less than 15 minutes to complete. She used untreated pine dowels plus regular pine boards, 1 meter of twine, and about 4 screws.
The idea is quite simple and can be easily seen from the pictures. Chloe also uses lots of diagrams to explain each step of the build process.
There are 9 steps in this tutorial and she lists out each step and explains it precisely. Chloe left her rack looking natural and raw, but you could, on the other hand, add a little creative finishing of your own.
29. Ashley's Modern Outdoor Furniture DIY Tutorial
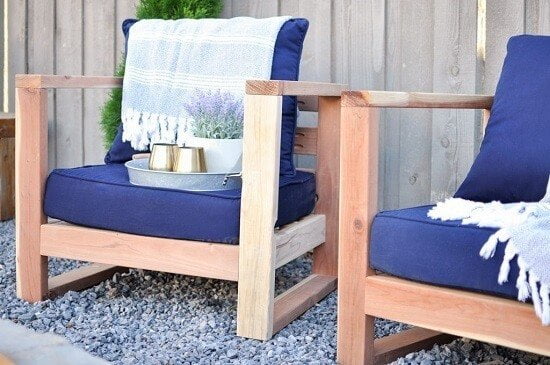
These set of modern and quite stylish outdoor chairs may look a bit difficult at first, but if you follow Ashley's step by step guide, you will have them built in no time.
She includes everything that you need: a tools list, materials list, and a cut list. You will need 4 pieces of 12-ft long 2x4 redwood boards. Like the name suggests, redwood does actually appear reddish, which makes furniture appear more beautiful.
The 5-step guide is hosted on another site, so you'll have to click over. It starts with the building of the arms, and then the attachment of the back supports, the side rails, seat supports, and that's it.
30. DIY Clamp Racks Tutorial
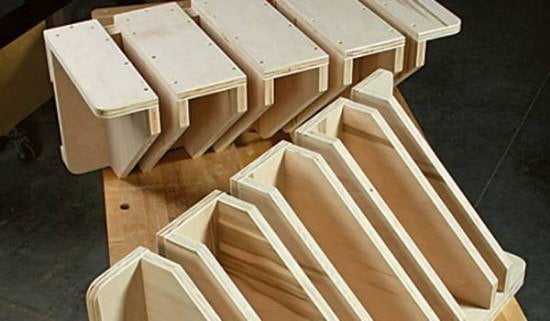
This one teaches you how to make 2 racks from a sheet of plywood. It is especially important for those who own lots of clamps or who intend to own them.
Each clamp rack can hold over 40 clamps. All you need is a 4 x 8 feet sheet of plywood, then follow the cutting instructions to make the best out of it.
This guide teaches you how to do it all and it also includes some pictures. You will need a drill, glue, and some screws for the assembly.
31. Elegant Cookbook or Tablet Stand Tutorial
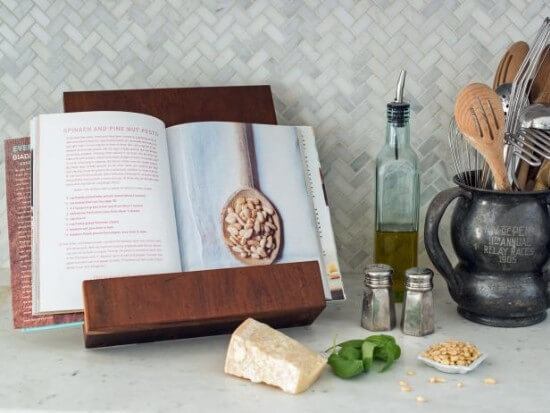
For those who love to cook, here's a very valuable project to help you when cooking from a recipe. This project offers a stand for your cookbook or tablet, so you can get easy glimpses at the recipe at hand.
It starts with listing the needed materials, which includes new or reclaimed 7/8-inch thick wood, an orbital sander, a driver, a saw e.t.c.
Lots of pictures with instructions guide you through the cutting, gluing, and drilling processes. It also shows you how to make the supports using triangular blocks of wood.
32. Wooden Squat Rack DIY Guide
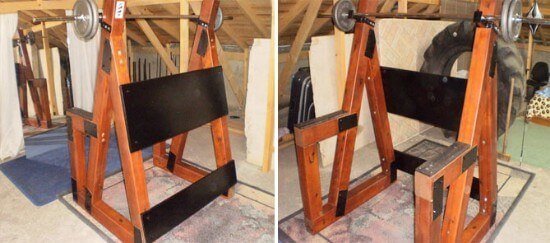
Yes, you can also build a squat rack by yourself in case you are into bodybuilding. The entire construction cost about $50 and it can hold up to about 300 lbs of weight.
This guide comes with a cut list diagram, which details all the parts that you'll need to build it. You can either use 4x4's or use double 2x4's like is shown in the picture.
In addition to joining the beams with screws, each of the joints has to be reinforced using metal plates. This makes the rack much more stable and longer lasting.
33. DIY Wooden Sofa Sleeve with Cup Holder Tutorial

If you've been wishing you can relax with a book and a cup of your favorite beverage on your sofa, then here's the solution.
With this project, you will create a wooden sleeve with a hole to act as your cup holder. You will be needing clamps, a drill, hole saw, and wood finish, plus other items.
The entire tutorial is delivered in 11 steps, making it easy for you to understand and follow each step. Large and clear pictures also help to make this an easy to understand tutorial.
34. One-Bottle Pallet Wine Rack from DIY Tutorial
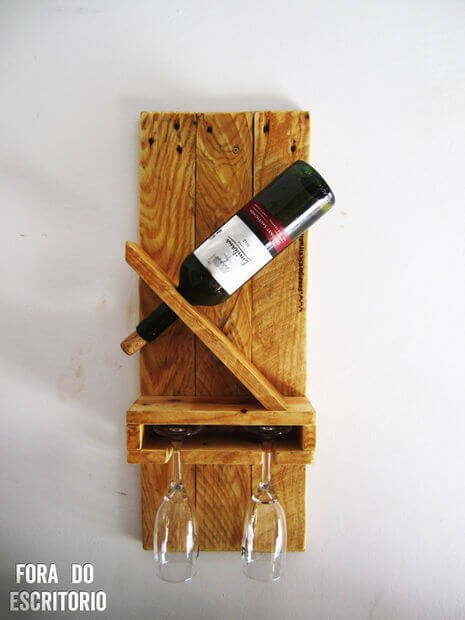
This tutorial shows you how to build a wine rack for a single bottle, including 2 glass holders. The wine bottle hangs upside down on this rack, just like the 2 glasses.
There are 10 steps in the construction of this project. The first step is the dismantling of a pallet to get some boards from it. This makes this project cost absolutely nothing.
Each of the steps is well detailed with instructions and lots of pictures. You get a materials list and a tools list, plus a link to a Portuguese version of the tutorial.
35. DIY Scrap Wood Designer Table Tutorial
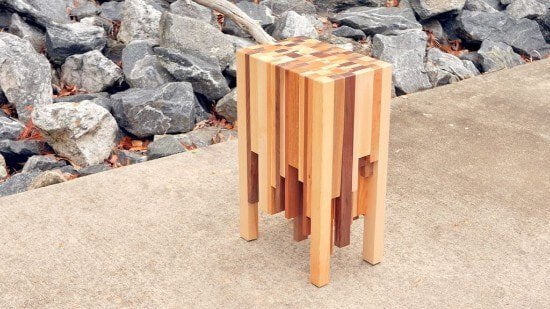
Here comes an amazing project which combines both woodworking skills and pure creativity to create something totally fabulous.
In addition to scrap hardwoods, glue, and varnish, you will also be needing a jointer and a planer. Other standard woodworking tools are needed as well.
This tutorial comes in 11 steps, beginning with the selection, gluing, and joining of the scrap wood pieces, to the layering of different steps, and the final sanding and finishing. This is an amazing artistic adventure with wood.
36. Modern & Stylish DIY End Table Tutorial
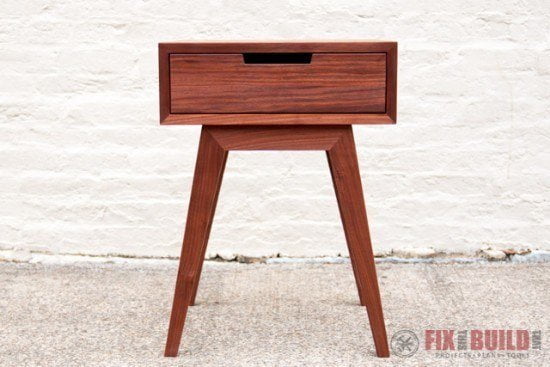
This tutorial also includes a video for those who love videos. It shows you how to build this 24-inch high, 17 inches wide and 17 inches deep table.
The tutorial is presented in a step by step guide with lots of pictures. It also includes a list of all the tools used, including a brad nailer, miter saw, clamps, a drum sander and an 8-inch jointer.
There is so much work to be done here, but if you follow the instructions, you'll get it all done right because every step is well explained.
37. Bluebird Houses DIY Tutorial

Are you a bird lover? If so, then consider trying out this project. You will use it to create a home for a wide variety of birds, so long as they can pass into the hole.
You get detailed plans for this project, including materials and tools lists. You are then led through each of the steps, including the drilling of the entrance hole.
Remember that if you make holes that are too big, you may attract unwanted bird species, so do your homework first.
38. DIY Tea Light Candle Holders from Plywood Tutorial
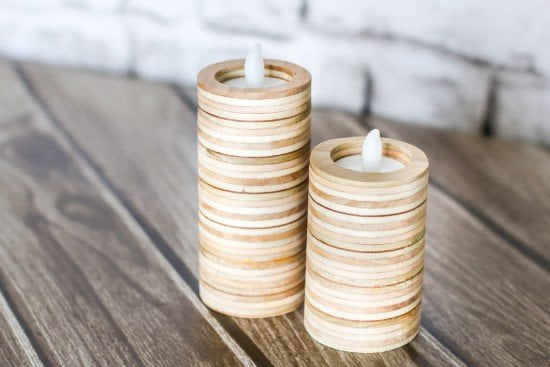
Also joining this list of easy woodworking projects is this candle holder made from scrap plywood. It is cute and easy to build, all you need are just the right tools.
A hole saw is necessary here, plus glue, a clamp, sandpaper, and varnish. The tutorial itself is simple and easy to follow.
If you are the romantic type, then you should definitely try this one out. You can also try to make them with different heights.
39. 4-Step French Cleat DIY Storage System Tutorial
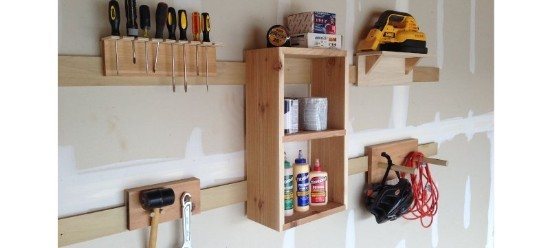
This DIY guide uses French cleats to create a flexible storage system. You will need to mount strips of wood with 45-degree cuts on the wall first, then make additional shelf items to hang on them.
Each of the storage pieces that you build to hang on the wall will also feature a strip behind with a 45-degree cut, but upside down.
This way, you can easily add the storage shelf anywhere you want, and also shift or re-arrange shelves as you wish.
40. French Cleat DIY Wall Organizing System Tutorial
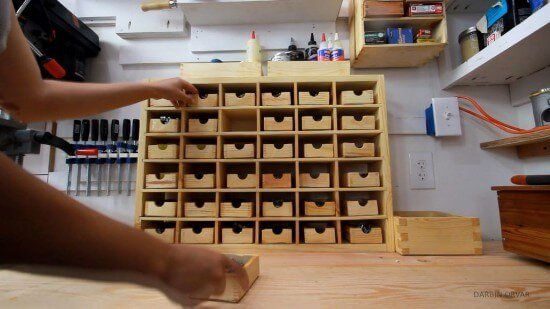
Here we have another storage and organizing system based on French cleats. This project though includes more pictures and videos.
The basic principles are the same, but you can get more shelf ideas like the mallet shelf from this guide.
41. Pallet Mug Rack with Shelves Tutorial
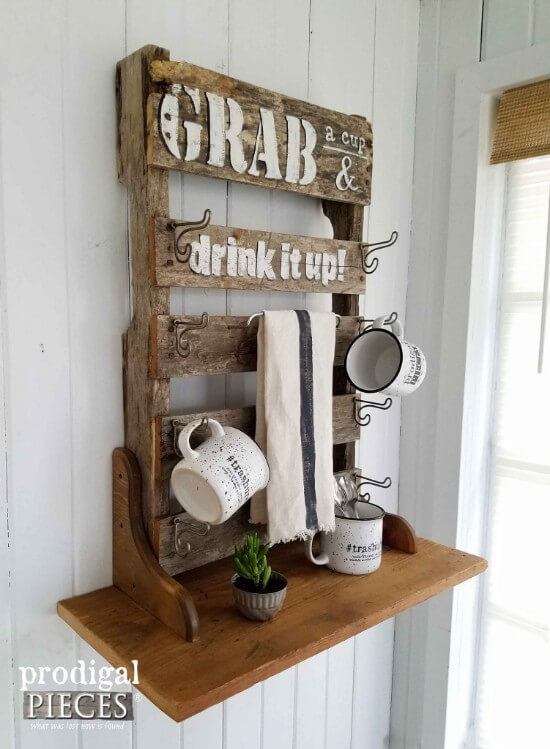
This project uses a pallet to create a mug rack and also provide some shelf space for hanging other items. You can use any type of wood you have available to try and get the same results.
Larissa takes you through this tutorial in detail. She uses lots of pictures and explains each process well, although she does not present the guide in a true step by step manner.
Instead of a rustic look, you can also decide to create a more modern-looking furniture piece. A little paint with some shiny hardware fittings can really make a difference here.
42. Simple & Stackable Saw Horses DIY Tutorial
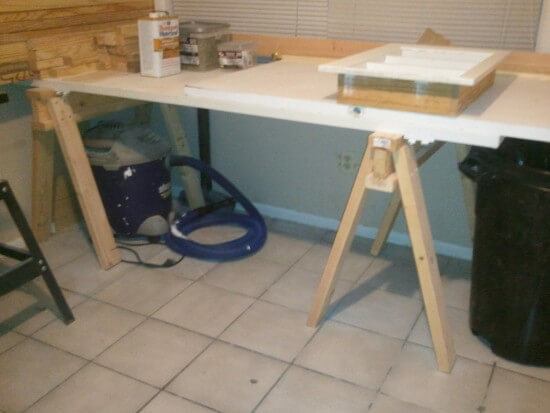
With this tutorial, you can create a bunch of sawhorses for your shop. They are easy to build and stackable as well, so you can save some space.
This tutorial is presented in 4 steps. The first step deals with the cutting of the wood, while the following steps deal with the arrangements and building process.
You also get a short tools and materials list, plus an included video for people who prefer to watch video tutorials.
Having come to the end of this list, it is my hope that you have found a project that meets your skill level and that you are willing to carry out.
I would love to hear from you. Feel free to use the comment section and let me know how you are doing and what you intend to build.
Also feel free to pin any pictures that you like and to share this list on the web.
Last Updated on February 13, 2020 by Tom Bradly
