How Many Types of Mortise and Tenon Joints Are There?
Woodworking is an ancient art used to create unique structures, including simple household items such as tables and chairs. Several techniques and methods are used to ensure strong joints. One such technique is known as the mortise and tenon joint.
But what is the mortise and tenon joint technique? How many types of mortise and tenon joints are there, and what makes them valuable? Hold on to your chisels because this guide will cover all these questions in detail.
What Are Mortise And Tenon Joints?
Since olden times, carpenters have used such joints for adjoining pieces of wood at right angles to each other.
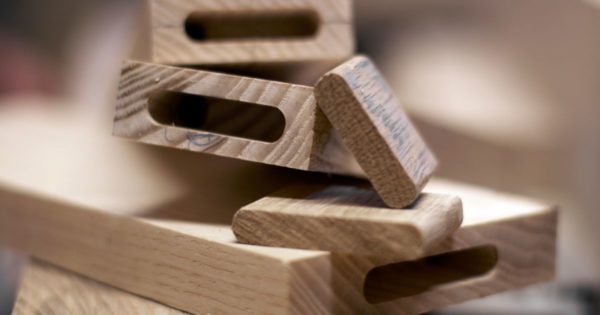
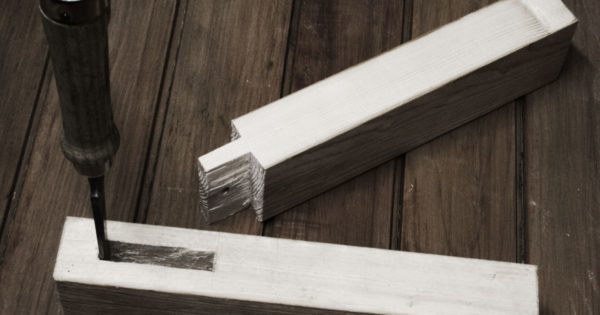
Essentially, the mortise is a hole, whereas the tenon is a tongue. The tenon is inserted inside the mortise, and the bond is secured with the help of glue or wedge.
As you can imagine, this type of joint is not only steady and durable but also looks quite elegant. Its sleek look is primarily why it stood the test of time and, up to this day, is used for furniture and such.
There are many variations of mortises and tenons, and each one of them is designed to work for a specific purpose. We shall cover all of them in detail.
What Is a Tenon?
Tenon is derived from the French word tenir, which means "to hold." There are many variations of tenons, such as a stub and a biscuit.
However, the tenon needs to be cut in the exact dimensions initially marked. A slight change could make it too loose or too big to be inserted.
What Is a Mortise?
Mortise has been derived from the French word mortaise, which means "an opening."
There are several variations of the mortise, such as a stub or an open. Just like a tenon, in the case of the mortise, if the dimensions are slightly off, it could create many problems for the joint to work effectively.
How Many Types of Mortises and Tenons Are There?

Both mortises and tenons have different types. All of them can be used interchanging for the same project. However, their design is meant for particular cases.
Types of Mortises
There are a lot of variations of Mortises. Namely, these are:
- Haunched Mortise
- Open Mortise
- Stub Mortise
- Through Mortise
- Twin Mortise
- Wedged Half-Dovetail
Haunched Mortise
The haunched mortise joint is used when the wood pieces to be adjoined look similar to an L-shape.
It will provide more resistance to being twisted and generally has a lot of surface area to be connected. Hence, don't be modest when applying glue.
Open Mortise
An open mortise has three sides. It looks similar to a T shape. It is beneficial when you need to provide extra support from the center.
Stub Mortise
As you can tell by its name, the stub mortise has variable depth. Essentially, depending on the size of the timber, the stub mortise is cut.
Through Mortise
This type of mortise completes passes through the tenon. You can see it from the other side.
It can be found in different tools like wood hammers and is quite helpful. To make it even more steady, insert a small chip of wood on the tenon to make the bond more controlled.
Twin Mortise
The twin mortise and tenon joint is more robust than regular joints since the tenon has two tongues inserted in two holes.
This assures a stronger bond and gives a larger surface area for glue to be applied.
Wedge Half-Dovetail
Unlike other mortises, the back is much broader than the front. Therefore, once it has been put in place, there is essentially no way (apart from breaking the tenon) of drawing out the tenon like you would in a regular joint.
Types of Tenons
Similarly, there are variations of tenons as well. Namely, these are:
- Hammer Headed Tenon
- Half Shoulder Tenon
- Biscuit Tenon
- Pegged/Pinned Tenon
- Top Tenon
- Loose Tenon
Hammer Headed Tenon
The hammer-headed tenon is used when working with curved shapes. It will essentially join the curved part to what can be referred to as a jamb.
Half Shoulder Tenon
This is an asymmetric tenon. Instead of having two shoulders, it has only one.
The half shoulder tenon is often used in braced doors and ledges.
Biscuit Tenon
As known by its name, the tenon has an oval shape, resembling a biscuit.
These types of tenons are used more in non-critical joints that do not require a lot of steadiness.
Pegged/Pinned Tenon
The pegged or pinned tenon uses a peg or a dowel pin. The mortise is drilled from the side where these pins are inserted.
You can find this type of joint most commonly used in timber framing joints.
Top Tenon
This type of tenon is used for the top end of a post.
Loose Tenon
The loose tenon is a separate piece of wood that gives it the name loose tenon.
How to Make a Mortise and Tenon Joint?

The process varies depending on the type of mortise and tenon joint you are making. However, for the most part, your general approach will be similar.
It also depends on the woodworking project which you are doing.
What Do I Need to Construct a Mortise and Tenon Joint?
To make a mortise and tenon joint, you don't require a lot of tools. You can create a through mortise and tenon joint with nothing but a drill machine and a saw alone.
However, for optimal working, the following tools will make your work as easy as finding a stud:
- Brass wheel marking gauge
- Six-inch combination square
- Dovetail saw
- Carcass backsaw
- Mallet
- Mortise chisel
- Bench hook or woodworking clamps
- Wood chisels
- A workbench
- A pencil to mark
Plan the Layout of the Joint
This comes unsaid, but planning is essential. If you start the project without the proper measurements and planning, you will quickly find yourself in a nuisance with the tenons and mortises not fitting perfectly. This includes planning what type of wood to use as well.
For the best joint, professionals suggest that the tenon should be approximately a third or a half of the stock wood used to make it. The reason for this is to avoid any creaks later on.
Therefore, first, grab your pencil and combination square to mark the dimensions of the tenon and the mortise hole.
We suggest you keep the area of the mortise hole a bit smaller than the tenon. This will later let you adjust if any irregularities pop up by simply sanding the excess part off.
Cut The Mortise
Let's start by first cutting the mortise. In the ideal case, it is better to keep the depth of the mortise roughly around three times the thickness of the tenon itself to keep the wood from splitting.
To cut the mortise, there are several ways to go about it. You can use a jigsaw or take a mallet and chisel out of the hole. We suggest sanding the edges once you remove the wood's central part for a more refined finish.
Cut the Tenon
This is relatively easier than mortise due to the shape.
To cut the tenon, put the wood piece on the workbench such that only the part that needs to be cut is facing away from the table.
You can then use a back saw, a shaper, or even a router to make the tenon.
Adjustments
You are almost done. Once you have made the tenon and mortise, put them together and see if they fit.
If you followed our instructions, you would have slight difficulty inserting the tenon due to the thicker mortise.
Now you can use sandpaper to remove the excess part until both pieces fit perfectly.
Fasten the Joint
It is time to fasten the joint now. Again, wood glue works best here, but you can use nails to make it more durable.
Apply the glue to only the areas that will be in contact. After doing that, use a clamp to join both parts together tightly.
Remove the excess glue and leave it to dry with the clamps on.
Alternatives to Mortise and Tenon Joint
While mortise and joints work great, there are a few alternatives to choose from as well. For example, you can use dowels or nails.
Dowels are essentially wood pegs that are shaped like a cell. You can simply drill holes inside the parts that need to be joined and connect them using the dowel.
While nails may not give you a clean finish, they are pretty steady. To connect two perpendicular pieces of wood, simply drive a nail from one end of the first piece to the other end. This can be done with a rubber mallet.
Conclusion
Woodworking is certainly enjoyable, and each project requires a different joint. To learn more about the types of joints in woodworking, click here.
In this article, we have discussed different types of mortise and tenon joints along with their uses. We also mentioned the best way to make these joints and their alternatives.
Last Updated on September 14, 2022 by Tom Bradly
